A Flush Cut Router Bit trims an overhanging edge to match a template or an existing surface. Its bearing follows that reference while the cutters remove the extra material. The result can be clean and precise. It can also go wrong quickly if the bearing loses contact or the workpiece shifts. Woodworking educator Marc Spagnuolo’s guidance can be condensed into this shop-floor rule: “Let the bearing guide the cut; don’t force the bit.” This is a paraphrase, not a verified verbatim quotation. It captures the key idea: steady control matters more than speed.
Before routing, check that the bit is sharp, firmly installed, and suited to the material. Unplug the router while making adjustments. Secure the workpiece, then test the setup on scrap that matches its thickness. Listen for changes in motor sound, and watch for burning, chatter, or a bearing that rides unevenly. These small clues matter. Feed direction depends on the router setup, so follow the tool manufacturer’s instructions and keep the work controlled. A light pass may leave a smoother edge than trying to remove too much at once. Still, no single setup suits every grain or template. That part deserves a second look. This guide explains how to choose the reference edge, position the bit, make controlled cuts, and inspect the finished surface. The goal is practical: a flush edge, a stable tool, and no guesswork hidden beneath sawdust.
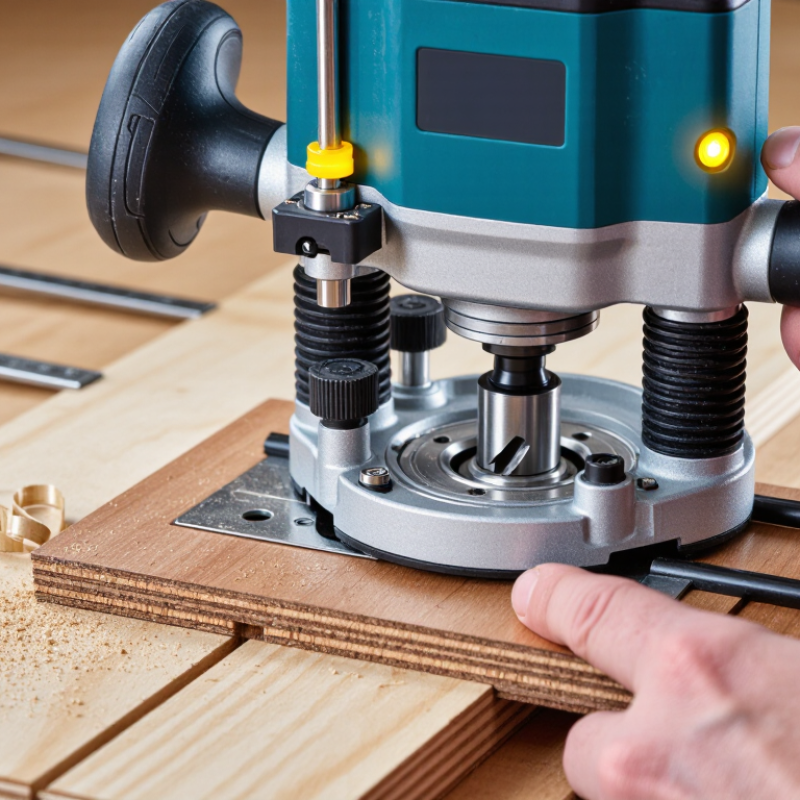
A flush-trim bit uses a bearing to follow a template or finished edge while its cutting flutes remove the overhanging material. The bearing may sit above or below the cutter, so check which surface it must contact before setting the bit height. Keep the bearing against the guide, not against loose chips or a rough edge. A small gap can leave a visible ridge.
Cutting direction matters. With a handheld router viewed from above, move counterclockwise around an outside profile and clockwise inside a cutout. This conventional feed keeps the bit cutting against its rotation rather than pulling the router forward. Keep it steady. A climb cut can grab suddenly, especially on a narrow workpiece. On a router table, the setup changes the feed direction; confirm the machine’s instructions before cutting.
Make a shallow test pass on scrap with the same template and material. Listen for chatter, and check whether the edge is clean before removing more material. I would not rush this step; dust or a slightly misaligned bearing can fool the eye. Clamp the work securely, keep hands clear of the cutter, and let the bit reach full speed before it touches the stock.

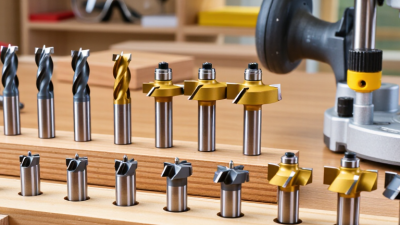
Choosing the right flush-cut bit starts with the template’s position. A bearing above the cutters follows a template placed on top; a bearing below follows one beneath the workpiece. Match the cutter length to the material thickness, and confirm the shank fits the router collet. Keep the template rigid with clamps or suitable double-sided tape, clear of the cutting path. Leave roughly 3 mm of material beyond the template when rough-cutting; the bit can remove it without taking a heavy bite. Small detail. Check the bit’s rated speed and the router’s collet instructions before switching on.
A stable router matters as much as the bit. Use a plunge router when the cut begins inside a panel; a fixed-base router can work well along an exposed edge. Keep the base flat, and feed steadily without forcing the cutter. Grain direction can change around a curved template, so take light passes and watch for tear-out. Wood movement also affects fit: the USDA Forest Products Laboratory’s Wood Handbook reports equilibrium moisture content of about 6.2% at 70°F and 30% relative humidity, rising to about 9.2% at 50% relative humidity. Acclimate the workpiece before tracing or trimming. The setup is not foolproof; even a carefully taped template can shift if dust collects underneath, so test the arrangement on scrap first.
| Selection or Setup Factor | Practical Choice | How It Works | Checks Before Routing |
|---|---|---|---|
| Bit style | Flush-trim bit with a bearing at the shank end | The bearing follows a template positioned above the workpiece while the cutter trims the material below it. | Confirm the bearing can contact the template continuously and the cutting edge reaches the full area to be trimmed. |
| Alternative bit style | Pattern bit with a bearing at the tip | The bearing follows a template placed beneath the workpiece; the cutters are above the bearing. | Check that the template is firmly supported and that the cutter length suits the workpiece thickness. |
| Shank diameter | Use a shank that matches the router collet; 1/2-inch shanks are generally more rigid than 1/4-inch shanks of comparable design. | A correctly matched, clean collet holds the bit securely. A larger shank can reduce deflection when the router accepts it. | Never force a shank into a different-size collet. Insert the shank to the depth specified by the router and bit instructions. |
| Cutting length | Choose a cutting length that covers the material thickness without unnecessary extra reach. | The cutters must reach the full edge being trimmed while the bearing stays aligned with the template. | Check the bit’s cutting length against the combined template and workpiece setup, and keep the bit securely supported in the collet. |
| Cutter diameter | Select a diameter that fits the template’s curves and the router’s capacity. | A smaller diameter can follow tighter curves; a larger diameter may be less suitable for small-radius details. | Check the template’s minimum curve radius and the router or bit manufacturer’s permitted bit diameter. |
| Router type | Use a router with a compatible collet, sufficient capacity for the bit, and a stable base. | A trim router can suit light trimming and smaller bits; a larger router may be appropriate for heavier work when the bit and setup are rated for it. | Verify compatibility and follow the router’s instructions for bit size, speed, and allowed use. |
| Template placement | For a shank-end-bearing flush-trim bit, place the template on top of the workpiece. | The bearing runs against the template edge, guiding the cutter to reproduce its shape in the workpiece. | Align the template with the finished outline and clamp it securely; keep clamps clear of the router’s travel path. |
| Template and workpiece support | Use a rigid template and support the workpiece so neither can shift or tip. | Stable support helps keep the bearing in contact with the template and the router base level. | Check for gaps, rocking, loose fasteners, and unsupported areas before starting the router. |
| Cut depth and passes | For thick stock or demanding cuts, remove material in multiple controlled passes when the setup allows. | Reducing the amount removed in each pass can help control the cut and reduce strain on the bit and router. | Keep the bearing engaged with the template during each pass, and never exceed the bit’s rated cutting capacity. |
| Speed and feed | Set speed according to the bit and router instructions; use a steady feed without forcing the cut. | Appropriate speed and feed help reduce burning, chatter, and poor cutting results. | Do not guess a universal RPM. Follow the specified limits and use the router’s recommended feed direction. |
| Safety and test cut | Inspect the bit, make a test cut on scrap, and wear eye and hearing protection. | A test cut can reveal alignment or setup problems before they affect the finished piece. | Disconnect power before changing bits or making adjustments. Wait for the bit to stop before setting the router down. |
A flush-cut router bit follows a template with its bearing while the cutters trim the workpiece to match. Start by fixing both pieces firmly to a sturdy bench. Use clamps near the edges, but keep them clear of the router’s travel path. The work should not shift under hand pressure. Not even slightly. If the template rocks or bows, the finished edge may copy that movement.
Unplug the router before adjusting the bit. Set the cutting depth so the bearing rides against the template while the cutters reach only the material that needs trimming. Avoid exposing more cutter than necessary. Check that the bit is seated securely in the collet, and keep the router base flat on the work. A tilted base can leave a sloped edge, even when the depth looks right.
Test the setup on scrap of similar thickness. Make a shallow pass, then inspect whether the bearing stays on the template and the cut reaches the intended edge. I often find the first depth setting is a little too ambitious; a small adjustment can help. Re-clamp if anything moves, and never guide the workpiece by hand near the bit. Go slowly. A clean result comes from stable support and careful checks, not force.
How to Use a Flush Cut Router Bit?
Routing Along the Template in Controlled Passes
Clamp the template firmly, then check that the bit’s bearing contacts its edge without rocking. Make a test cut on scrap from the same material. A flush-cut bit removes the overhang; it does not correct a loose template or a poorly supported workpiece. Trim excess material in shallow passes, leaving a small amount for the bearing-guided pass. The right depth depends on the bit, router, and stock. Forcing a deep cut can cause chatter, scorching, or a rough edge. Small bites matter. Keep the router base flat, feed steadily, and let the cutter reach full speed before entering the wood.
Pause and inspect the bearing and cut between passes. If the edge starts to burn or the motor labors, reduce the cut or check for a dull bit. Dust matters, too. NIOSH’s Pocket Guide to Chemical Hazards lists a recommended exposure limit of 1 mg/m³ for wood dust as an eight-hour time-weighted average. That figure makes effective extraction and suitable respiratory protection worth considering, especially during repeated routing. I find it easy to focus only on the template line; dust collection can become an afterthought. Don’t let the last pass become a hurried one. Stop the router before lifting it away, and check the finished edge for small tear-out spots.
After using a flush-cut router bit, inspect the edge in bright, angled light. A low lamp makes small ridges and torn fibers easier to see. Run your fingertips gently along the cut, but keep them clear of the bit whenever the router is powered. Unplug it before checking the cutter or bearing. Look for a proud lip, a shallow dip, or a rough patch near the end grain. These marks often reveal a shifting template, a dull cutter, or feed pressure that changed mid-pass.
For a tiny raised spot, use a sanding block with fine paper and work with the grain. Check often; it is easy to soften a crisp corner while chasing one small flaw. If material remains beyond the template, secure the work and template again, then take a light pass only when the bearing can track a clean, stable edge. Don’t force the router to repair a deep gouge or a badly shaped template. It may copy the defect instead. I have sometimes mistaken a shadow for a ridge, so wipe away dust and inspect again before removing more wood. A scrap test can show whether the adjustment is actually improving the edge.