What Are the Best Router Bits for Every Project?

Choosing the Best Router Bits can determine whether a project produces clean joinery or rough, burned edges. A straight bit may cut a dado quickly, while a round-over bit softens a tabletop in seconds. The right profile matters.

Grand View Research valued the global power tools market at approximately $36.1 billion in 2023. Its report projects continued growth through 2030. However, that figure covers complete power tools, not router bits alone. This limitation deserves attention. Market growth does not automatically prove one bit is better than another.

Router authority Pat Warner wrote, “The router is the most versatile tool in the workshop.” His observation still fits modern woodworking. A single router can shape hardwood, trim laminate, cut dovetails, and create precise templates. Yet performance depends on more than the brand name. Carbide quality, shank diameter, bearing accuracy, cutting geometry, and router speed all affect the final surface.

The U.S. Consumer Product Safety Commission continues to emphasize safe operation around powered cutting equipment. Secure workpieces, sharp cutters, and suitable eye protection remain essential. A dull bit can create heat, vibration, and unpredictable tear-out. Small details matter.

This guide compares bit types for cabinets, furniture, trim, signs, and repair work. It considers real workshop conditions, including changing grain direction and limited budgets. Some recommendations may not fit every router or material. That is worth admitting. The best choice often depends on the cut, the wood, and the operator’s experience.
What Are the Best Router Bits for Every Project?

Understanding Router Bit Types and Their Cutting Functions

Router bits differ mainly by cutting geometry, not appearance.

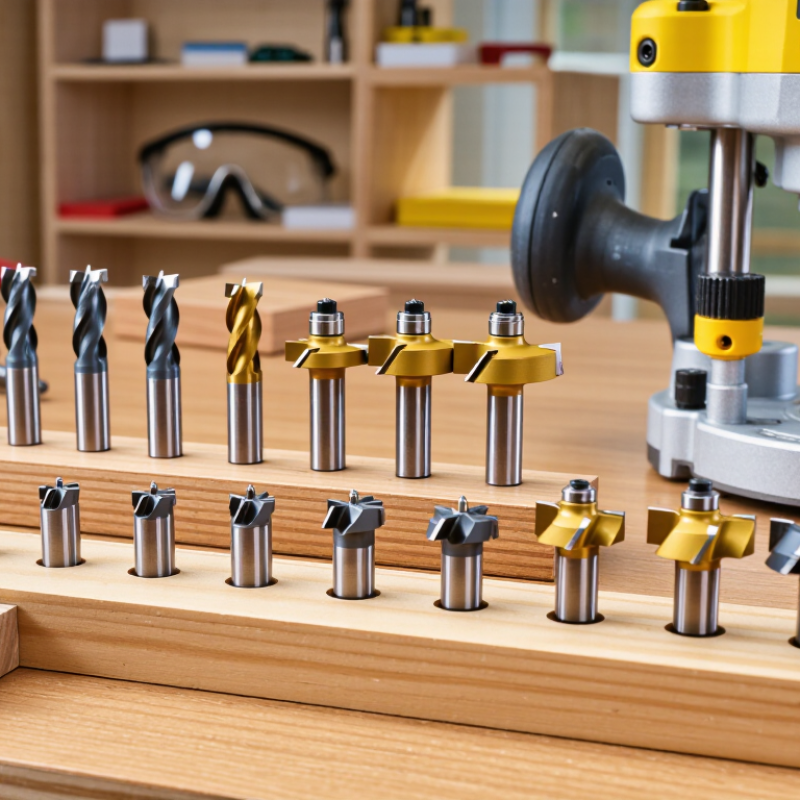
Straight bits remove material with flat, vertical flutes, making them useful for grooves, dados, and mortises. Spiral upcut bits lift chips from deep channels, while downcut versions press fibers downward for cleaner top surfaces.

Flush-trim bits copy a template edge. Round-over and chamfer bits shape exposed edges. V-groove bits cut lettering and decorative channels. Rabbeting bits create shoulders for backs, shelves, or joints.

Wood choice matters more than many beginners expect.

The USDA Forest Products Laboratory’s Wood Handbook, Technical Report FPL-GTR-282, lists oven-dry density near 0.37 g/cm³ for eastern white pine and about 0.68 g/cm³ for white oak. Dense stock usually demands slower feed pressure and sharper edges.

At 24,000 revolutions per minute, a 1/4-inch bit travels roughly 1,571 feet per minute at its cutting edge. That speed can burn wood quickly.

I still make test passes on scrap, because a setting that worked yesterday may fail on damp or figured grain. A clean cut is not always a safe cut.

Tips:

Match bit diameter to the cut depth. Make several shallow passes instead of one deep pass. Let the bit cut; do not force it. Inspect carbide edges under strong light.

The U.S. Occupational Safety and Health Administration identifies routers among high-speed woodworking tools requiring guarded operation, secure workholding, and effective chip control.

I sometimes overlook dust direction. That mistake is worth correcting.

A vacuum port, eye protection, and a stable fence improve both visibility and control.

Choosing Router Bits for Wood, Joinery, Edges, and Decorative Details

Choosing router bits starts with the wood and task, not an impressive-looking profile. Straight bits suit grooves, dados, and simple mortises. Spiral bits can clear chips smoothly in plywood and figured hardwood. For clean joinery, match the bit diameter to the joint whenever possible. A loose fit often signals poor setup, not bad timber. Test on an offcut first.

Always.

Edge work needs steady control and suitable bearings. Round-over bits soften sharp corners on shelves and tabletops. Chamfer bits create crisp, angled edges with a clear geometric look. Flush-trim bits follow a template and help duplicate curved parts accurately. Rabbet bits cut ledges for backs, doors, and case construction.

Make several shallow passes instead of forcing one deep cut. Your hands will notice the difference.

Decorative details need restraint. Cove, V-groove, and ogee bits can add shadow lines, panels, or delicate borders. Use scrap wood to check depth, grain direction, and visual scale. A large profile may overwhelm a narrow frame.

I once chose a dramatic edge for a small cabinet, and it looked clumsy after finishing. That mistake changed my process. Now I judge the profile beside the actual workpiece before routing.

Keep cutters sharp, secure the material firmly, and remove dust between passes. Perfect results still depend on patient setup.

Matching Bit Materials, Shank Sizes, and Profiles to Each Project

Choosing a router bit starts with the project, not the drawer of tools. Carbide-tipped bits handle hardwood, plywood, and laminates well because their edges resist wear. High-speed steel bits cut softly and cleanly in pine, but they usually dull sooner. I have found that a sharp, modestly priced bit cuts better than a premium bit damaged by heat.

◆

Shank size matters as much as cutting material. Use a 1/2-inch shank when your router accepts it, especially with large profiles or deep cuts. It usually reduces vibration and improves control. A 1/4-inch shank suits compact routers and light edge work. Never force an incompatible shank into a collet. It may appear secure, but the bit can slip dangerously.

◆

Match the profile to the joint or edge. Straight bits suit dados, grooves, and hinge recesses. Rabbeting bits remove material along a shoulder. Round-over bits soften table edges, while chamfer bits create crisp angled details. For raised panels, use a large profile only in a powerful, stable router. Make several shallow passes instead of one aggressive cut. Test the setup on scrap first. Even experienced woodworkers misread grain direction. A climb cut can tear the edge quickly, so feed against the bit’s rotation and support the work firmly. Inspect bearings, cutting edges, and collet contact before every session. A small oversight can leave burn marks, chatter, or an uneven profile.

Using Router Bits Safely with the Right Speed and Setup

What Are the Best Router Bits for Every Project?

Choosing a router bit starts with the cut, not the tool. Straight bits suit grooves, while roundover bits soften exposed edges. Flush-trim bits follow a template accurately. Rabbeting bits create clean steps for joints and backs. For delicate plywood, I prefer sharp carbide cutters and shallow passes. A dull bit creates heat, chatter, and frustration.

Speed matters as much as bit shape. Larger bits need slower revolutions because their cutting edges travel farther each turn. Always check the bit manufacturer’s rated speed before switching it on. Secure the workpiece firmly, install the bit fully, and leave the correct shank length inside the collet. Unplug the router during adjustments. Keep both hands outside the cutting path.

Start with a test cut on scrap wood. Watch for burning, vibration, or a harsh cutting sound. These signs often indicate excessive speed, a dull edge, or an overly deep pass. I once rushed a profile cut and removed too much material near a corner. The mistake was small, but the repair took much longer. Now I raise the bit gradually, usually in several passes. Even experienced users can misjudge grain direction. Feed the router against the cutter’s rotation for ordinary edge work, and maintain steady pressure without forcing it. Safety glasses, hearing protection, and dust control remain essential, especially when routing dense materials.

What Are the Best Router Bits for Every Project? — Using Router Bits Safely with the Right Speed and Setup

Project or Task Recommended Bit Type Typical Cutting Profile Suitable Materials Useful Setup Starting Speed Guidance Key Safety Practice
General straight cuts and dados Straight bit Flat-bottomed groove or dado Softwood, hardwood, plywood, MDF Use a straightedge, guide rail, or template; make several shallow passes for deep cuts. About 18,000–24,000 rpm for small diameters; reduce speed as diameter increases. Do not plunge deeper than the bit and router can safely handle in one pass.
Edge rounding Round-over bit Convex radius on an edge Solid wood, plywood with suitable edging, MDF with sealed edges Set the bearing against the edge and test the height on scrap material. Approximately 18,000–24,000 rpm for common small and medium profiles. Keep the workpiece firmly supported; route end grain carefully to reduce tear-out.
Softened or beveled edges Chamfer bit Angled bevel Hardwood, softwood, plywood, MDF Use the bearing for consistent edge work; use a fence for non-bearing bits. Approximately 18,000–24,000 rpm for smaller bevels; lower for larger diameters. Avoid forcing the router, which can increase burning and cause an uneven bevel.
Flush trimming and pattern work Flush-trim bit Cuts one surface level with another Wood, plywood, laminates, solid-surface materials rated for routing Secure the template or workpiece; choose a top- or bottom-bearing design to match the setup. Approximately 18,000–24,000 rpm for common small-diameter bits. Keep the bearing clean and rotating freely; never rout loose templates or unsupported stock.
Decorative grooves and sign lettering V-groove bit V-shaped channel or engraved line Wood, plywood, MDF, some plastics with suitable tooling Use a guide, lettering template, or CNC-compatible fixture; take light passes. Approximately 18,000–24,000 rpm for small engraving profiles. Maintain a steady feed rate to prevent dark spots and uneven groove width.
Significant edge profiles and molding Ogee or molding bit Compound decorative profile Solid wood and stable wood-based panels Use a router table for large profiles whenever practical; make multiple passes. Often about 12,000–18,000 rpm for larger profiles; follow the bit’s rated maximum. Large-diameter bits require reduced speed and a stable router table setup.
Joining boards and panels Edge-jointing or rabbeting bit Step, shoulder, or mating edge Solid wood, plywood, MDF Use a fence or bearing and verify the bit height with a dry fit before cutting the full project. Approximately 16,000–22,000 rpm, depending on cutter diameter. Support long boards and keep the cut direction consistent to avoid tipping.
Cabinet and box joinery Dovetail bit Tapered interlocking socket or pin Hardwood, softwood, plywood Use a dedicated dovetail jig or accurately secured template. Approximately 16,000–22,000 rpm for common small and medium bits. Clamp the jig securely and test the fit on scrap before routing finished parts.
Large circles and arcs Plunge bit with circle-cutting jig Controlled interior or exterior curve Plywood, MDF, solid wood Use a pivoting jig and secure the center point; remove waste in shallow passes. Approximately 18,000–24,000 rpm for small straight bits; reduce speed for larger cutters. Keep the router base fully supported throughout the arc and keep hands away from the cutter.
Laminate and thin sheet trimming Carbide flush-trim or laminate-trimming bit Trims an overhanging layer flush Plastic laminate, veneer, plywood, wood composites Use a bearing-guided bit and leave a small, even overhang for the final pass. Typically about 18,000–24,000 rpm for small-diameter cutters. Use dust extraction and avoid cutting adhesive-heavy material faster than recommended.
Safety and speed note: The rpm figures are practical starting ranges, not universal limits. Always follow the cutter’s marked maximum speed, the router manufacturer’s instructions, and the material-specific guidance. Use the correct collet and shank size, insert the shank fully without bottoming out, tighten it securely, inspect the bit for damage, wear eye and hearing protection, and keep both hands on the router whenever the operation allows.

Maintaining, Storing, and Replacing Router Bits for Reliable Results

A reliable router bit begins with disciplined maintenance, not a premium label. After each project, inspect the carbide edges under bright light. Look for chips, dark heat marks, resin buildup, or a dull cutting line. Clean residue with an approved bit cleaner and a soft brass brush. Avoid scraping carbide aggressively. It can alter the edge geometry. I sometimes used to wipe bits and return them immediately. That habit was not ideal.

Store bits upright in individual sleeves or a divided case. Keep cutting edges from touching metal, loose screws, or other bits. Moisture matters too. A dry cabinet with moderate temperature helps prevent corrosion on steel shanks. Check the shank before installation, including scoring, rust, and uneven wear. Insert it fully, then withdraw it slightly before tightening. Excessive vibration often indicates poor seating, damage, or an unsuitable speed.

Replace a bit when sharpening cannot restore a clean edge, or when vibration continues after correct setup. Burning wood is a warning, not a finish-quality feature. NIOSH’s Current Intelligence Bulletin 38 recommends controlling wood dust exposure at 1 mg/m³ as a time-weighted limit, so effective extraction also protects the operator and reduces abrasive buildup. OSHA 1910.242(b) limits compressed-air cleaning to below 30 psi with guarding and protective equipment. Vacuum the work area instead. I still occasionally postpone replacement to finish one last panel. That decision can cost more than a new bit.