What Is a Keyhole Router Bit Used For?
A Keyhole Router Bit cuts a narrow slot with a wider pocket at one end. That shape lets a screw head pass through the opening, then slide into a hidden retaining channel. It is a small cut with a useful job. The right bit can help you hang a cabinet, mirror, or shop jig without visible brackets.
Woodworking educator Marc Spagnuolo is a useful reference for careful router technique, but no verified quotation from him about keyhole bits was provided. Rather than inventing one, this guide follows a practical shop rule: “Test the cut on scrap before routing the finished piece.” A scrap board reveals whether the slot fits the screw head and whether the pocket is deep enough. It also shows how the router behaves at the start and end of the cut.
The details matter. Match the bit’s cutting dimensions to the fastener, secure the workpiece, and follow the bit maker’s speed and setup guidance. Keep the router base flat. Move steadily, and avoid forcing the tool through the cut. A clean test fit should let the screw enter easily, then hold when the workpiece slides into place. Too loose, and the fixture may shift. Too tight, and installation becomes a struggle.
This introduction explains what a Keyhole Router Bit is used for, how its distinctive profile works, and where it fits in practical woodworking. It also considers common setup mistakes. The bit is simple, but the first test cut is still worth making.
What a Keyhole Router Bit Cuts: A Narrow Slot and Wider Screw Pocket
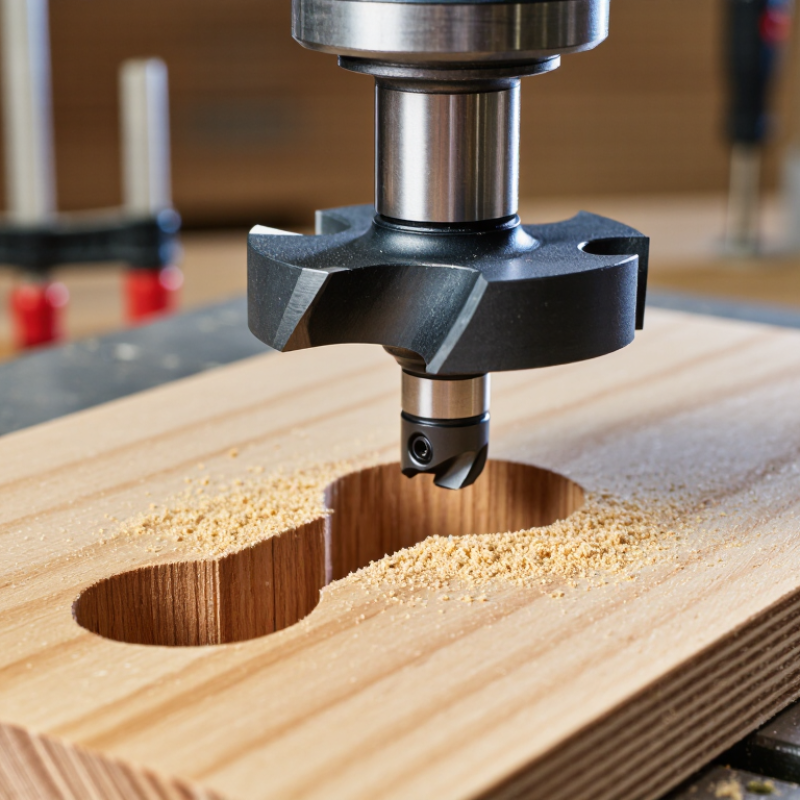
A keyhole router bit cuts a narrow slot connected to a wider pocket. The screw head enters the pocket, then its shank slides into the narrow slot. This lets a wall-mounted plaque or small cabinet hang from a screw without a visible bracket. The pocket must be wide and deep enough for the screw head, while the slot should guide the shank without letting it slip out. Bit dimensions vary, so check the bit and screw together before cutting.
The fit also depends on the wood. The USDA Forest Products Laboratory’s Wood Handbook reports average shrinkage of about 7.1% tangentially and 4.0% radially from green to oven-dry wood. Those figures describe a large moisture change, not ordinary indoor movement, but they show why wood species and grain direction matter. A tight test fit can become less reliable as conditions change. That detail is easy to overlook.
Tips: Clamp the work securely and make a test cut in scrap. Check that the screw head seats in the wider pocket and the shank moves freely through the slot. Keep the cut shallow enough to preserve material behind it. I would still test the actual mounting screw; bit labels alone do not guarantee a clean fit.
What a Keyhole Router Bit Cuts
A keyhole bit creates a narrow slot connected to a wider pocket. The slot fits the screw shank; the pocket lets the screw head enter. Dimensions vary by bit, so check the manufacturer’s specifications before cutting.
Illustrative example only: the pocket is wider than the slot. Actual cut widths depend on the router bit.
Bit Anatomy and Common 1/4-Inch or 1/2-Inch Shanks
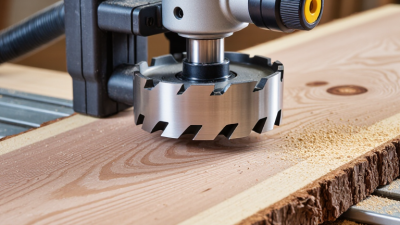
A keyhole router bit cuts a hanging slot with a narrow opening and a wider cavity underneath. Its shape creates this profile: a slim neck sits above a broader cutting head. The neck forms the visible channel, while the head removes material below it. A screw head can slide into the wider pocket and remain captured behind the narrow opening.
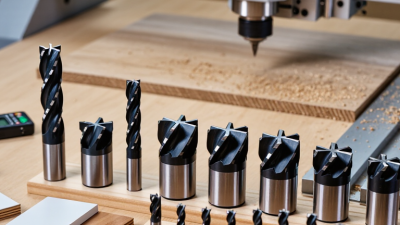
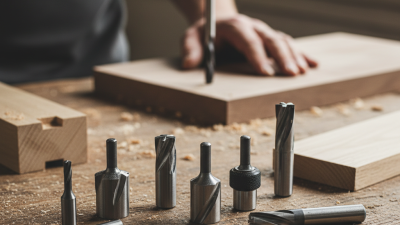
The bit’s shank is the smooth section held by the router collet. Common sizes are 1/4 inch and 1/2 inch, but the correct choice depends on the router’s collet. Never force a larger shank into a smaller collet. A 1/2-inch shank is generally stiffer, which can help reduce vibration, while a 1/4-inch shank fits routers designed for that size. Shank diameter does not determine the slot dimensions; the cutter’s profile does.
Check the bit’s cutting length and the workpiece thickness before routing. Unplug the router while installing the bit, then tighten the collet securely. A shallow test cut in scrap wood can reveal whether the channel fits the intended screw head. It may take a small adjustment. Move the router steadily, and avoid forcing the bit through the cut. A loose workpiece or an incorrect depth can leave a rough slot or a weak hanging point.
What Is a Keyhole Router Bit Used For? - Bit Anatomy and Common 1/4-Inch or 1/2-Inch Shanks
| Feature |
Dimension or anatomy |
Purpose and practical notes |
| Typical use |
A narrow entry slot connected to a wider recessed pocket |
Cuts a keyhole-shaped recess in the back of a plaque, sign, or similar item so it can hang on a screw head. The screw head enters the wider pocket, while the narrow slot settles around the screw shank. |
| Shank |
Common nominal diameters include 1/4 in (6.35 mm) and 1/2 in (12.7 mm) |
The shank is the smooth portion held by the router collet. Match the bit diameter to the collet; do not force a larger shank into a smaller collet or use an unsuitable reducer. |
| Cutter head |
Wider than the narrow neck; exact diameter varies by bit model |
Forms the enlarged pocket that receives the screw head. Check the cutter diameter and the intended screw-head size before routing. |
| Neck and cutting edges |
The neck is narrower than the cutter head; cutting-edge count and geometry vary |
The neck creates the slot that engages the screw shank. A bit’s cutting geometry determines how it removes material, so follow the manufacturer’s instructions for feed direction and use. |
| Slot depth |
Set by the bit geometry and the depth of cut |
Make the recess deep enough for the screw head to seat, while leaving adequate material at the front of the workpiece. Test the fit on scrap of the same thickness. |
| Workpiece setup |
Use a stable, securely clamped workpiece |
A plunge router or a suitable router-table setup can be used when compatible with the bit and the tool instructions. Keep hands clear of the cutter and use appropriate eye and hearing protection. |
| Fit and load |
Screw-head size, slot width, material thickness, and mounting hardware all matter |
A keyhole slot is a hanging feature, not a published load rating. Choose suitable hardware and verify the finished fit and mounting strength for the item and wall material. |
Note: Keyhole-bit cutter dimensions and compatible screw sizes are model-specific; check the bit specifications and test the cut before working on the finished piece.
How Keyhole Slots Let Screw Heads Support Hanging Panels
A keyhole slot is a small hanging feature cut into the back of a panel. Its wider pocket admits a screw head, while the narrower channel catches the screw’s shank. The panel then slides downward, leaving the head seated inside the slot. It is a simple connection. But the fit matters.
A keyhole router bit cuts this stepped shape in one pass when used correctly. Mark the slot locations carefully, and keep them aligned with the screw positions on the wall. The screw head must pass through the wider opening, yet remain too large to slip through the narrow channel. Leave enough space behind the panel for the head to enter freely. A tight fit can make hanging awkward; an oversized slot may feel loose.
The method works well for lightweight frames, signs, and small cabinet panels, but it does not make every panel safe to hang. Check the panel material, thickness, and expected load, and use suitable wall fasteners. Test the slot on scrap first. I would not trust a single slot to carry a heavy panel without checking the design and support points. Keep the router steady, and avoid cutting too close to an edge, where thin material can split.
Choosing a Bit by Matching Slot Dimensions to the Screw Head
A keyhole router bit cuts a wider entry pocket connected to a narrower hanging slot. The screw head passes through the pocket, while its shank settles into the slot. The fit matters. If the slot is too wide, the mounted piece may wobble or lift off easily.
Measure the screw head’s diameter and thickness, then compare them with the bit’s cutting profile. The entry pocket needs enough clearance for the head to pass through without forcing it. The narrow slot should accept the shank but remain smaller than the head’s retaining surface. A snug fit, not a jammed one, is the goal. Small variations in screw shape can change the result.
Test the setup on scrap from the same material. Cut a short slot, insert the screw, and slide the workpiece downward. Check that the head enters smoothly and holds when seated. If it binds, the pocket may be too tight or too shallow. If it rocks, adjust the slot width or screw choice. I’d avoid judging fit by dimensions alone; a slightly countersunk head may behave differently. Router depth also matters: leave enough material behind the slot to resist splitting, especially near an edge.
Routing the Slot: Plunge, Cut, Withdraw, and Follow the Bit’s Speed Rating
A keyhole router bit cuts a narrow channel with a wider pocket beneath it. The slot lets a screw head slide into the pocket, then hold a picture, small cabinet, or sign against a wall. The narrow opening hides most of the screw. Check the bit’s shape and the workpiece thickness before cutting; the pocket must leave enough wood above it.
Clamp the work securely and mark the slot’s path. Set the bit depth, then check the bit’s stated speed rating and keep the router at or below that limit. Some keyhole bits are designed for plunging; confirm yours is before lowering it into the wood. Keep the router base flat, plunge at the marked starting point, and move steadily along the line without forcing the cut. Small steps help.
Withdraw with care. Raise the bit clear of the work while the router is running, then switch it off and wait for the bit to stop. A test cut in scrap reveals whether the screw head enters and holds properly. It also exposes mistakes in depth or alignment—easy details to overlook when the slot looks clean from above.