Mastering Tongue and Groove Router Bits: A Comprehensive Guide for DIY Enthusiasts
In the world of woodworking, precision and craftsmanship are paramount, and mastering the use of
Tongue and Groove Router Bits is an essential skill for DIY enthusiasts
looking to elevate their projects. According to a report by the Woodworking Business Network, the global market for woodworking tools
is expected to reach $10 billion by 2025, driven by the increasing popularity of home improvement projects
among consumers. Tongue and groove joints, known for their strength and aesthetic appeal, are widely used in
applications ranging from flooring to cabinetry. As DIYers seek to implement professional-grade techniques at home, understanding the nuances
of using Tongue and Groove Router Bits not only enhances their woodworking capabilities but also contributes to project durability and
visual appeal. This comprehensive guide aims to provide essential insights and practical tips, empowering enthusiasts to tackle various
woodworking tasks with confidence and precision.
Understanding the Basics: What Are Tongue and Groove Router Bits?
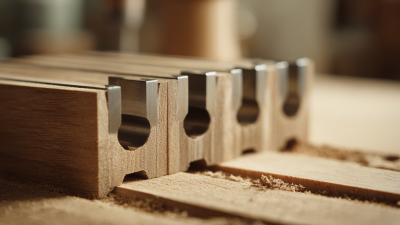
 Tongue and groove router bits are essential tools for any DIY enthusiast looking to create
strong, precise joints in woodworking projects. These bits feature a unique design that allows them to carve out a tongue on
one piece of wood and a corresponding groove on another, ensuring a snug fit. Understanding the basics of tongue and groove
router bits involves recognizing their versatility and advantages—they can be used in a variety of applications, from cabinetry
to flooring, vastly improving the structural integrity of the joints.
Tongue and groove router bits are essential tools for any DIY enthusiast looking to create
strong, precise joints in woodworking projects. These bits feature a unique design that allows them to carve out a tongue on
one piece of wood and a corresponding groove on another, ensuring a snug fit. Understanding the basics of tongue and groove
router bits involves recognizing their versatility and advantages—they can be used in a variety of applications, from cabinetry
to flooring, vastly improving the structural integrity of the joints.
In recent years, advancements in cordless tool technology have made it easier
than ever for DIYers to embrace these bits without the constraints of cords. The latest cordless routers provide an impressive
amount of power and runtime, surpassing what was available just a few years ago. This progression allows enthusiasts to work
with tongue and groove router bits in more flexible environments, ensuring they can achieve professional-quality results
wherever they're building, whether it's in a workshop or on-site. Embracing these innovations will ultimately enhance the
woodworking experience, making it more accessible and enjoyable.
Key Benefits of Using Tongue and Groove Joints in DIY Projects
Tongue and groove joints are a staple in woodworking, particularly for DIY enthusiasts aiming to create strong, aesthetically pleasing projects. These joints enhance structural integrity by providing greater surface contact between connected pieces, which can distribute loads more evenly. According to industry reports, projects utilizing tongue and groove joints can withstand over over 30% more stress compared to traditional butt joints. This can significantly reduce the risk of joints separating over time, especially in applications like flooring and paneling.
In addition to strength, tongue and groove joints offer a seamless appearance that is often desired in furniture and cabinetry. With their ability to interlock, they minimize gaps, which not only improves visual appeal but also enhances insulation and soundproofing in certain installations. Reports indicate that using tongue and groove joints can result in a quicker assembly process, as they are designed to fit together without complicated layouts. For DIY enthusiasts, these benefits make tongue and groove router bits an essential tool in their workshop arsenal, allowing them to tackle various projects with confidence and precision.
Types of Tongue and Groove Router Bits: A Comparison Guide
When it comes to woodworking, tongue and groove joints are essential for creating strong, seamless connections between panels. The most effective way to achieve these joints is by using tongue and groove router bits. Understanding the different types of these bits can significantly enhance your DIY projects. Generally, tongue and groove router bits come in three main types: traditional, adjustable, and specialized bits designed for specific materials like laminate.
Traditional tongue and groove bits are the most widely used and offer great versatility for various wood types. According to industry reports, over 60% of woodworking professionals prefer these bits due to their reliability and ease of use. Adjustable bits allow customization of tongue and groove sizes, making them perfect for projects requiring precise measurements. Lastly, specialized bits for materials like MDF or plywood have been designed to minimize tear-out, providing a clean finish—a feature that is crucial for aesthetic applications.
**Tips**: Always ensure you use high-quality bits, as they can significantly affect the precision of your cuts. Additionally, make multiple passes with lighter cuts to prevent overheating, which can lead to bit damage. Finally, consider experimenting with different bit angles and profiles to find the best fit for your specific woodworking projects.
Essential Techniques for Using Tongue and Groove Router Bits Effectively
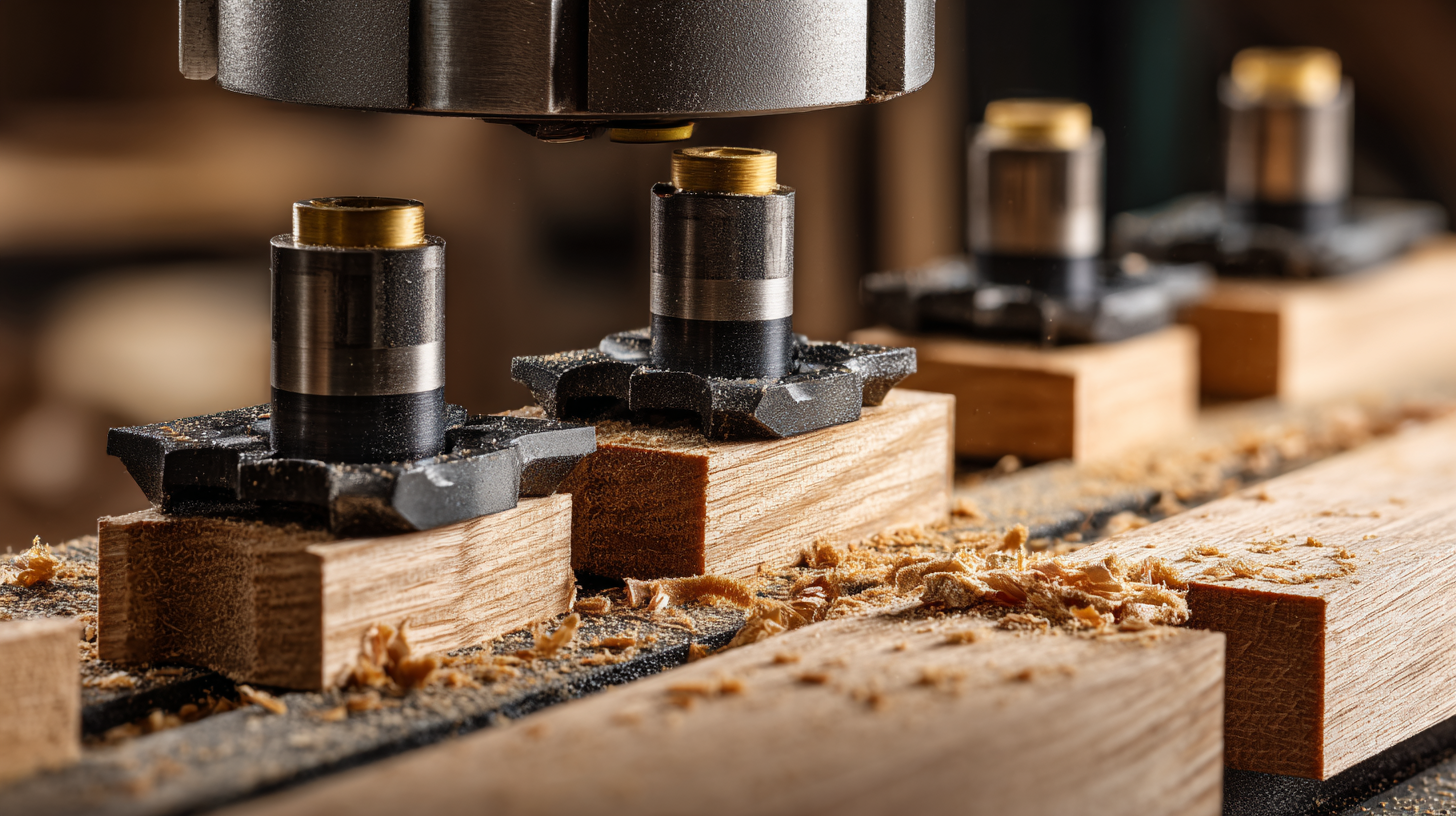
When using tongue and groove router bits, mastering essential techniques is key to achieving professional results. These bits are perfect for creating snug-fitting joints in woodworking projects, and understanding how to handle them can significantly enhance the quality of your work. Start by ensuring your router is properly set up; this includes selecting the right speed and depth of cut. A slower feed rate generally results in a cleaner cut, minimizing the risk of tear-out.
One crucial tip is to make sure your material is secure before starting. Using clamps to hold your workpiece in place prevents movement that can lead to imprecise cuts. Additionally, always make sure to route in the correct direction relative to the bit's rotation; this helps in preventing kickback and ensuring smooth cuts. For safety, always wear eye protection when operating a router.
Lastly, practice is vital. Before working on your final project, take some time to experiment with scrap pieces of wood. This allows you to fine-tune your technique and gain confidence in using your tongue and groove router bits. By incorporating these tips, DIY enthusiasts can effectively harness the potential of these versatile tools and achieve beautiful results in their woodworking endeavors.

Common Mistakes to Avoid When Working with Tongue and Groove Bits
When working with tongue and groove router bits, even seasoned DIY enthusiasts can make missteps that lead to frustration and wasted materials. One common mistake is failing to properly set the depth of the cut. It’s crucial to ensure that the router bit is set at the correct height to achieve a snug fit between pieces. Inaccurate depth can cause pieces to be too loose or too tight, resulting in gaps or difficulty in assembly.
Another pitfall is rushing through the setup and cutting process. Taking the time to measure, clamp, and secure your workpieces can significantly improve the quality of your cuts. A stable workpiece reduces vibration, leading to cleaner and more precise cuts. Remember to check alignment regularly; misalignments can quickly compound into larger issues as you progress.
Tips: Always perform a test cut on scrap wood before working on your project material. This helps to confirm your settings and avoid costly errors. Additionally, keep your router bits clean and sharp to ensure smooth cutting and reduce the risk of burning or chipping your workpieces. Taking these precautions will help minimize mistakes and enhance the overall quality of your projects.
Common Mistakes to Avoid When Working with Tongue and Groove Router Bits