How to Crimp Butt Connectors in 2026?
In 2026, reliable electrical repairs still depend on careful preparation, suitable tools, and repeatable technique. Crimping Butt Connectors creates a strong connection when the wire, terminal, and crimp profile match correctly. This guide introduces a practical method for selecting connectors, preparing conductors, and checking finished crimps. It focuses on everyday workshop conditions, where lighting, space, and wire quality are not always ideal.
A professional result begins with identifying wire size, insulation type, and connector material. Strip only the required length, avoiding cuts or flattened strands. Insert the conductor fully, then position the connector in the correct die cavity. Apply steady pressure until the tool completes its cycle. Small details matter. A good crimp should hold firmly without crushing the connector or exposing excessive copper. Heat-shrink insulation should sit evenly over the joint, with no sharp edges beneath it.
Visual inspection and a gentle pull test can reveal loose conductors before the connection enters service. For critical wiring, follow the connector manufacturer’s instructions and use a calibrated crimping tool when available. Electrical testing can confirm continuity, but continuity alone does not prove mechanical strength. I have seen rushed repairs pass a meter check and fail after vibration or repeated flexing. That is an easy mistake to make. This article also examines common errors, tool limitations, and sensible improvements for safer, more dependable results. Do not guess. When the crimp looks uneven, cut it off and try again with fresh connector material.
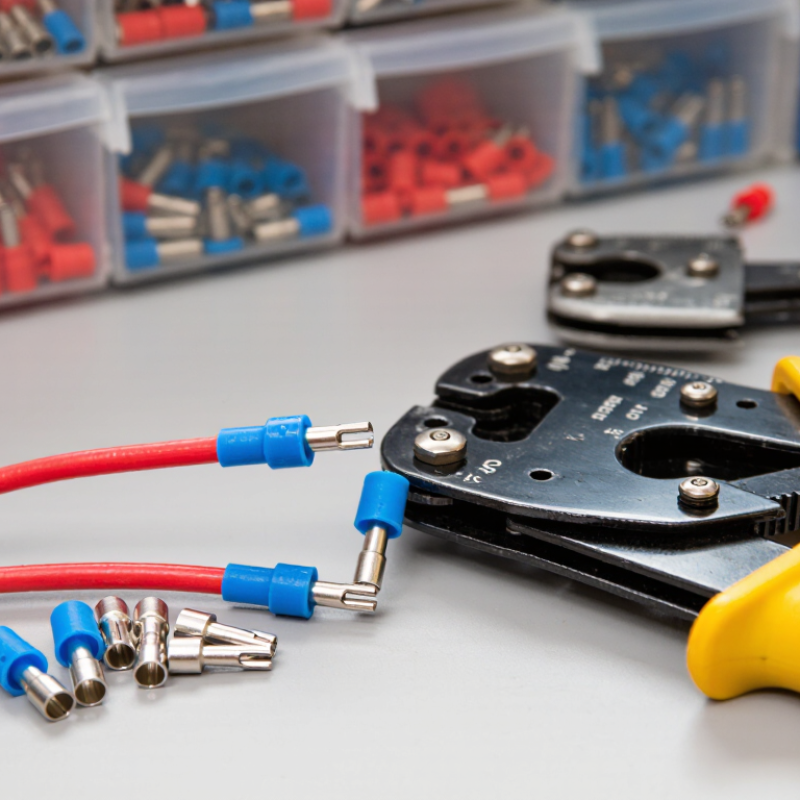
Select a Butt Connector That Matches the Wire and Application
How to Crimp Butt Connectors in 2026?
Select a Butt Connector That Matches the Wire and Application
Choose a butt connector based on the wire’s conductor size, insulation, and working conditions. A connector that is too large may grip poorly; one that is too small can damage strands or resist insertion. Check the wire gauge printed on the insulation or measure the conductor, then match it to the connector’s stated range. Copper wire needs a connector approved for copper, while other conductor materials require compatible fittings. Don’t guess.
Next, consider the environment. A dry indoor repair may need a different connector from wiring exposed to moisture, vibration, or heat. Insulated connectors can help prevent accidental contact, but insulation alone does not guarantee a sealed joint. For damp locations, choose a connector designed for that exposure and follow its installation instructions. Look closely at the crimp-barrel material and the insulation temperature rating.
Match the crimping tool to the connector type, too. The right die should compress the barrel without cutting through it or leaving the wire loose. Strip only the specified length; too much bare conductor can remain exposed, while too little may sit outside the barrel. Tug each finished wire gently. It should stay put. Even careful work can miss a detail, so inspect the joint and test continuity before putting the connection into service.
Gather the Crimping Tools and Prepare the Wires
How to Crimp Butt Connectors in 2026?
Gather the Crimping Tools and Prepare the Wires
Before crimping, match the connector to the wire material, gauge, and insulation type. Read the size markings on the connector and check the wire’s printed gauge; color alone can be misleading. Use a ratcheting crimper with dies specified for that connector style. IEC 60352-2:2020 covers solderless crimped connections and emphasizes that reliable results depend on compatible terminals, conductors, and tooling. A good-looking crimp is not proof of a sound connection.
Cut the wire square with a wire cutter, then strip only the length specified by the connector maker. The strands should remain clean and untwisted. Slide the connector onto the wire until the stripped copper reaches the internal stop, if present. No copper should be trapped under the insulation, and no bare strands should extend beyond the barrel. Inspect the crimper for worn jaws or debris; uneven dies can leave a loose, misshapen crimp. I have seen careful setups spoiled by one rushed strip.
Tips: Make a test crimp on spare wire of the same gauge. Pull firmly on the wire, then inspect the barrel for cracks, exposed strands, or movement. If the connection shifts, stop and check the die size, strip length, and tool setting before continuing. Don’t guess.
Strip the Wire Ends to the Connector’s Required Length
Before crimping a butt connector, check its specified strip length. The correct measurement depends on the connector, not guesswork. Some connectors include a small guide on the packaging or in their instructions. Use that figure when available. A wire stripped too short may not reach the metal barrel fully. Too much exposed copper can remain outside the connector, where it is vulnerable to damage.
Measure from the wire tip and mark the insulation lightly. Then use a wire stripper suited to the conductor’s gauge. Close the tool gently and remove the insulation without cutting into the strands. Look closely at the exposed copper under good light. Nicked or missing strands reduce the conductor’s effective cross-section; cut the end back and strip it again if needed. A clean end matters.
Keep the strands together, but do not twist them into a tight, stiff point. Slide the wire into the connector until the insulation meets the barrel’s edge, with no bare copper showing outside. I once relied on a quick visual estimate and stripped one end longer than intended. It seemed minor, but the copper was awkwardly exposed. Measure both ends carefully. Small details matter.
Insert Each Wire and Crimp the Connector Securely
How to Crimp Butt Connectors in 2026?
Insert Each Wire and Crimp the Connector Securely
Strip only enough insulation to expose the conductor length specified for your connector. Keep every strand intact. A nicked or missing strand can weaken the joint, even when the outside looks neat. Match the connector size to the wire gauge, then push each wire fully into its own end. The insulation should sit near the barrel opening, not beneath the crimp. For repeatable results, use a ratcheting crimper with dies marked for the connector type. NASA-STD-8739.4A, a workmanship standard for crimped electrical connections, emphasizes controlled tooling and inspection rather than guesswork. That matters on a small bench, where a slightly crooked crimp can be easy to miss.
Center the barrel in the correct die and squeeze the handles through a complete cycle. No half-crimps. Check that the conductor cannot slide out with a firm hand pull, and inspect for split metal, exposed strands, or insulation trapped inside the barrel. A tug test is useful, but it is not a substitute for the connector maker’s specified pull-force test or applicable qualification data. If the barrel deforms unevenly, stop and check the die size and tool alignment before making another connection. I have seen tidy-looking crimps fail this basic check; appearance alone is not proof. Use heat-shrink insulation only when the connector is designed for it, and keep the finished joint dry and free of strain.