What Is a Flattening Router Bit Used For?

A wide live-edge slab can look level until a straightedge rocks across its center. That is where a Flattening Router Bit earns its place. Mounted in a router and guided over a stable sled, its broad cutting edges remove high spots across the board. The result is a flatter surface for joinery, sanding, or finishing—not a guarantee of perfect stock.

The USDA Forest Products Laboratory’s Wood Handbook: Wood as an Engineering Material (FPL-GTR-282, 2021) documents how wood changes dimension as its moisture content shifts. That matters when flattening slabs: a board can move after machining, even when the router pass looks clean. Wood scientist R. Bruce Hoadley’s published work explains the underlying principle. Paraphrased: “Moisture changes make wood move.” This is a summary, not a verified verbatim quotation about router bits.

The cutter’s diameter, edge geometry, router speed, and feed rate all affect the surface. So do the sled’s stiffness and the board’s support. Start with shallow passes. Check for tear-out, heat marks, and loose setup components before continuing. A wider bit can cover more area, but it still needs careful alignment. And here is the less tidy part: flattening is not a substitute for acclimating wood or correcting a weak workholding setup. This guide explains what a Flattening Router Bit does, how it removes material, and what to consider before using one.
What Is a Flattening Router Bit Used For?

Definition and Typical 1½-Inch Cutter Diameters of Flattening Router Bits

A flattening router bit is designed to remove high spots and leave a broad, level surface, usually while guided by a router sled. It is commonly used on rough slabs, glued panels, and spoilboards that are too wide for a thickness planer. Many flattening bits have a 1½-inch cutter diameter. That measurement describes the cutting width across the bit, not the depth it can safely remove in one pass.

A 1½-inch cutter covers a useful strip without being unwieldy for many sled setups. Its wide path can reduce the number of passes, though the actual result depends on the router, sled stiffness, and material. Overlap each pass slightly; missed narrow ridges can remain surprisingly visible after sanding. Keep cuts shallow, especially on figured or uneven wood. A large diameter does not make deep cuts safe. Check the bit’s specifications, since cutter designs and recommended feed rates vary.

It is easy to assume that every “1½-inch” bit leaves exactly that much usable width. Not always. The cutting edges, setup, and path alignment affect the finished surface. A test pass on scrap can reveal chatter or uneven tracks before you work on a valuable slab. I would also inspect the surface under angled light; small ridges are easy to miss while the router is running.
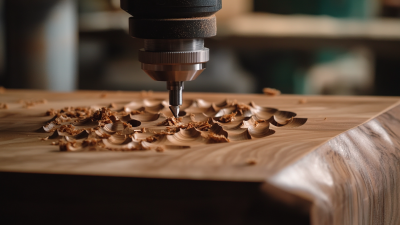
How a Router Sled Uses the Bit to Level Slabs and Spoilboards

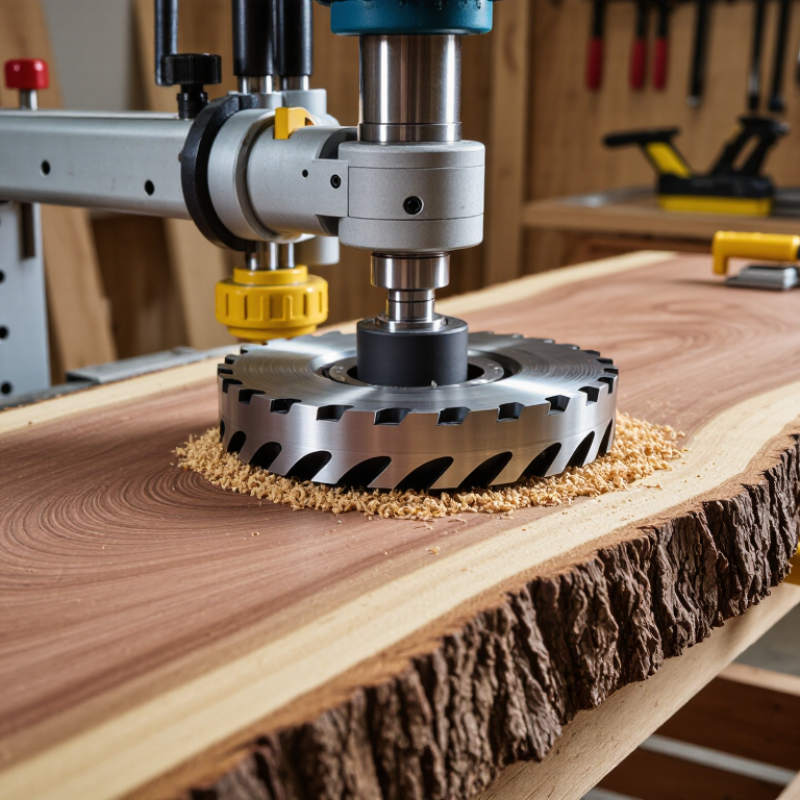
A router sled turns a handheld router into a guided surfacing tool. The router travels across a carriage, while the carriage moves along two parallel rails set beside the slab. A wide flattening bit removes high spots in shallow passes. The rails need to sit level and remain stable; otherwise, the cutter can reproduce their tilt across the wood.

Secure the slab so it cannot rock, then lower the bit just enough to skim the surface. Move the router in overlapping lanes, keeping the pace steady. Thin cuts reduce strain and make ridges easier to spot. It is not magic. Check the surface with a straightedge between passes, and watch for loose bark, knots, or bumps that could catch the cutter. Dust builds quickly, so extraction and eye protection matter.

The same setup can level a spoilboard. A light pass removes grooves and uneven patches, giving future work a flatter support surface. I still check the rails again before cutting; a small shift can leave a stubborn slope. Even careful work may show faint tracks, so finish with a fine pass rather than forcing a deeper cut.

What Is a Flattening Router Bit Used For?

Example pass overlap at 50%: A flattening bit removes material in a wide path as a router sled moves across a slab or spoilboard. Overlapping adjacent passes helps avoid ridges between cuts. The values shown are calculated from each nominal bit diameter; adjust overlap and cut depth to suit your setup and material.

Cutting Design: Flat-Bottom Profiles, Carbide Edges, and ½-Inch Shanks

A flattening router bit removes high spots and creates a level surface across a broad workpiece. Its wide cutter leaves a flat-bottom profile, useful for flattening slabs, trimming glue-ups, or making shallow recesses. On a rough tabletop, that broad cut can reveal a more even surface after several passes. It is not a shortcut around careful setup.

The cutting design matters. Carbide edges hold their sharpness through repeated work, but they can still chip if they strike a fastener or hit a hard knot. A ½-inch shank often feels more rigid than a smaller shank, which can help reduce chatter. Check that your router’s collet accepts it. Not every router does. Feed steadily, and take light passes; forcing a wide bit can leave ridges or strain the tool. The finish may still need sanding.

Tips: Secure the workpiece and check the bit’s seating before switching on the router. Keep each pass shallow, especially when flattening a large panel. Watch for dust buildup and listen for changes in the cut. A smooth sound is reassuring, but it does not prove the surface is level; verify with a straightedge. I would not trust appearance alone.

Choosing Pass Depth and RPM Within the Bit Maker’s Published Limits

A flattening router bit is used to level a broad wooden surface, such as a glued-up panel or a slab held in a router sled. Its wide cutting edge removes high spots in overlapping tracks. A clean result depends less on forcing the bit through the wood than on keeping each pass controlled.

Use the bit maker’s published maximum pass depth as a limit, not a target to exceed. Taking several shallower passes can reduce chatter, heat, and strain on the router. Small cuts matter. Check the bit instructions and router manual, since safe depth can vary with cutter size, material, and machine. A deep cut may look faster, but it can leave ridges or overload the setup.

Set RPM within the published range for that specific bit. Larger cutters often require lower speeds, but do not guess from diameter alone. Secure the work, confirm the bit is seated properly, and let the router reach speed before cutting. Keep feed steady; pausing in one spot can scorch the surface. It is tempting to chase a perfectly flat finish in one session. Still, a light final pass may reveal small areas that need another careful adjustment.

What Is a Flattening Router Bit Used For? - Choosing Pass Depth and RPM Within the Bit Maker’s Published Limits

Situation or decision Practical use or starting guidance Pass depth RPM selection What to check
Flattening a slab or tabletop A flattening bit travels across the workpiece in a router sled or other guided setup to remove high spots and bring the surface into one plane. Start with a light cut, around 1/16 in (about 1.6 mm). Take multiple passes where needed. Use the bit maker’s published RPM limits for that specific cutter. Do not exceed the stated maximum. Confirm the router and sled are secure, the cutter is properly seated, and the workpiece cannot shift.
Routine material removal For a rigid, well-supported setup and a sharp bit, increase the cut only if the router runs smoothly and the cutter’s instructions permit it. A conservative starting range is 1/16–1/8 in (about 1.6–3.2 mm) per pass; actual capacity depends on the bit, material, and setup. Choose a setting within the published range. If the maker specifies different limits for different cutter diameters, follow the limit for the exact bit. Listen for changes in motor sound and watch for vibration, chatter, or unusually heavy feed resistance.
Removing a pronounced high spot Remove the high area in successive, controlled passes rather than trying to take the full depth at once. Keep each pass shallow. Do not exceed the pass-depth guidance in the cutter instructions or the capacity of the router and sled. A speed control is not permission to exceed the cutter’s published maximum RPM. Use the maker’s guidance when selecting a lower setting. Stop if the cutter chatters, the router bogs down, or the workpiece or sled moves. Reduce the cut and inspect the setup.
Working with a larger-diameter cutter A larger cutter has a higher cutting-edge speed at the same RPM than a smaller cutter, so its permitted operating speed may be lower. Do not increase pass depth just because the cutter is wider. Follow the cutter maker’s instructions and use light test passes. Use the published maximum for the cutter’s diameter and design. There is no single safe RPM that applies to every flattening bit. Check the cutter markings and instructions before fitting it; verify that the router can be set within its permitted speed range.
Choosing feed and overlap Move the router steadily and overlap adjacent tracks enough to avoid leaving ridges. Avoid pausing with the cutter spinning in one place. If the surface shows deep ridges or the cut feels too demanding, reduce the depth on the next pass. Keep RPM within the published limits while adjusting feed and pass depth to suit the material and cut. A consistent feed and overlapping tracks help produce a more even surface; inspect the surface after each pass.
Burning, chatter, or excessive load These are reasons to stop and reassess—not to push the router harder through the cut. Try a shallower pass and check that the bit is sharp, clean, and correctly installed. Recheck the actual setting against the cutter maker’s published limits. Do not guess at a new maximum. Inspect the bit, collet, workholding, sled rigidity, and chip clearance before restarting.

Important: The pass depths above are conservative starting guidance, not universal limits. The cutter maker’s instructions and published RPM limits take precedence. If the bit’s maximum RPM or operating guidance is unavailable, do not assume a safe value.

Material Limits, Tear-Out Risks, and When Planing Is the Better Choice

A flattening router bit cuts a broad, shallow path across a slab held in a router sled. It is useful when a panel is wider than a planer, or when one face needs leveling before further work. Its limits are real: the bit removes material slowly, and the sled must stay rigid and level. Deep passes can strain the cutter, leave ridges, or make the router harder to control. Take light passes, check for loose knots and embedded grit, and keep the cutter moving steadily.

Tear-out becomes more likely where grain reverses, around knots, and near unsupported edges. A sharp bit and shallow cuts help, but they cannot make unstable wood behave predictably. Moisture matters, too. The USDA Forest Products Laboratory’s Wood Handbook (FPL-GTR-282, 2021) places the fiber-saturation point at roughly 25–30% moisture content; below it, moisture loss can cause dimensional shrinkage. That does not mean a slab is stable just because its moisture reading looks acceptable. Give the stock time to acclimate, and inspect it again after flattening.

For ordinary boards that fit the machine, a planer is usually quicker and leaves less router-sled cleanup. A router sled makes more sense for oversized slabs or irregular faces, but it produces dust and often needs sanding afterward. Not always. I still check the grain direction twice, because one missed reversal can leave a torn patch that takes longer to repair than the cut itself.